Party Favors for Wine Tasting: Creative, Budget Ideas (DIY)
Ready to host a wine night your friends won’t forget? Thoughtful party favors for wine tasting make guests feel seen, send them home smiling, and keep the conversation going.
Great favors do more than fill a bag. They capture favorite pours, note tasting highlights, and tie your theme together. A small keepsake turns a fun evening into a lasting memory of the wines you loved.
In this post, you’ll find creative ideas, smart selection tips, easy DIY options, and simple presentation advice. Expect budget-friendly picks, quick wins, and a few stylish touches that feel effortless. Cheers to favors that look good, travel well, and get used.
Creative Party Favor Ideas for Your Wine Tasting Party
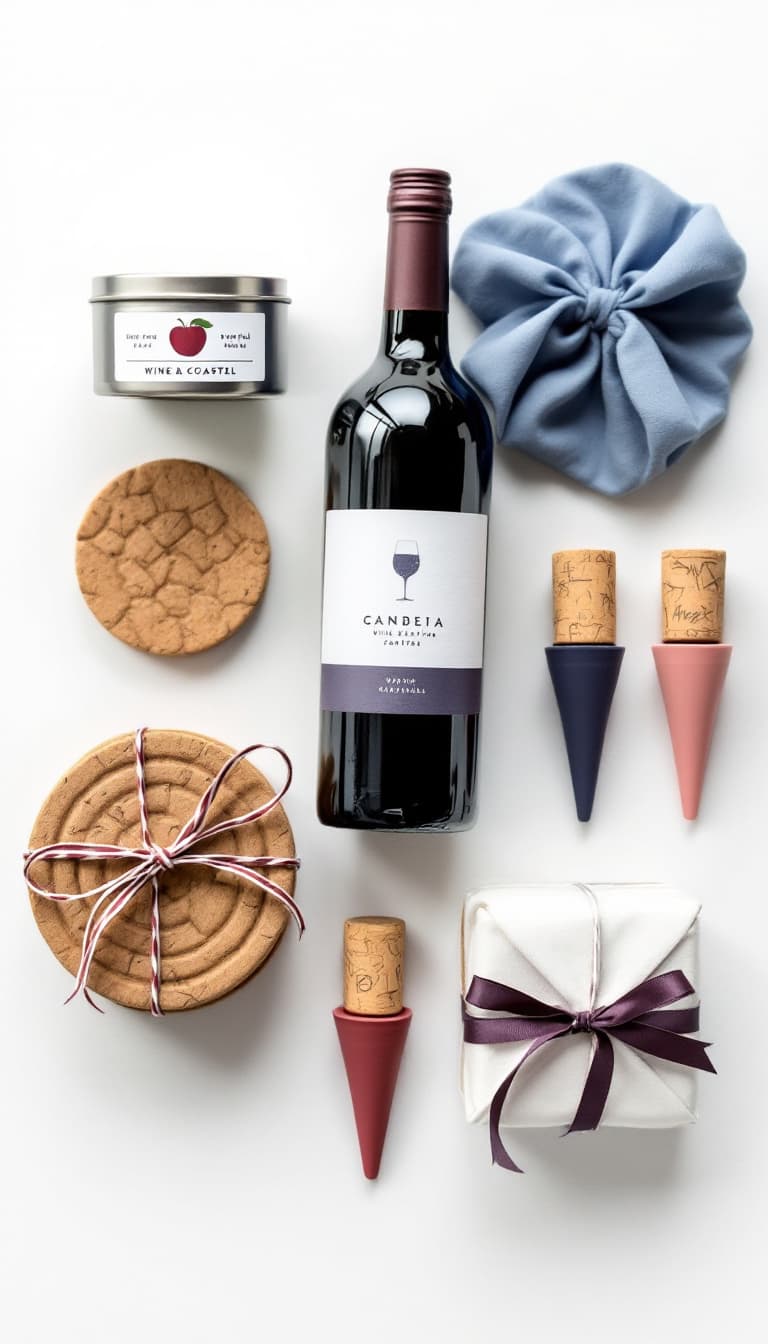
Send guests home with favors that feel personal, tie back to the wines, and actually get used. Mix a few budget picks with one standout piece. Keep sizes small so they travel well, and add a tag or note so guests remember their favorite pour.
Quick alternatives if you need extras for larger groups:
- Wine-scented candles: Small tins, labeled by varietal, sourced from Etsy or local makers.
- Cork coasters: Sets of two, stamped with your party date, found on Amazon or made with cork tiles.
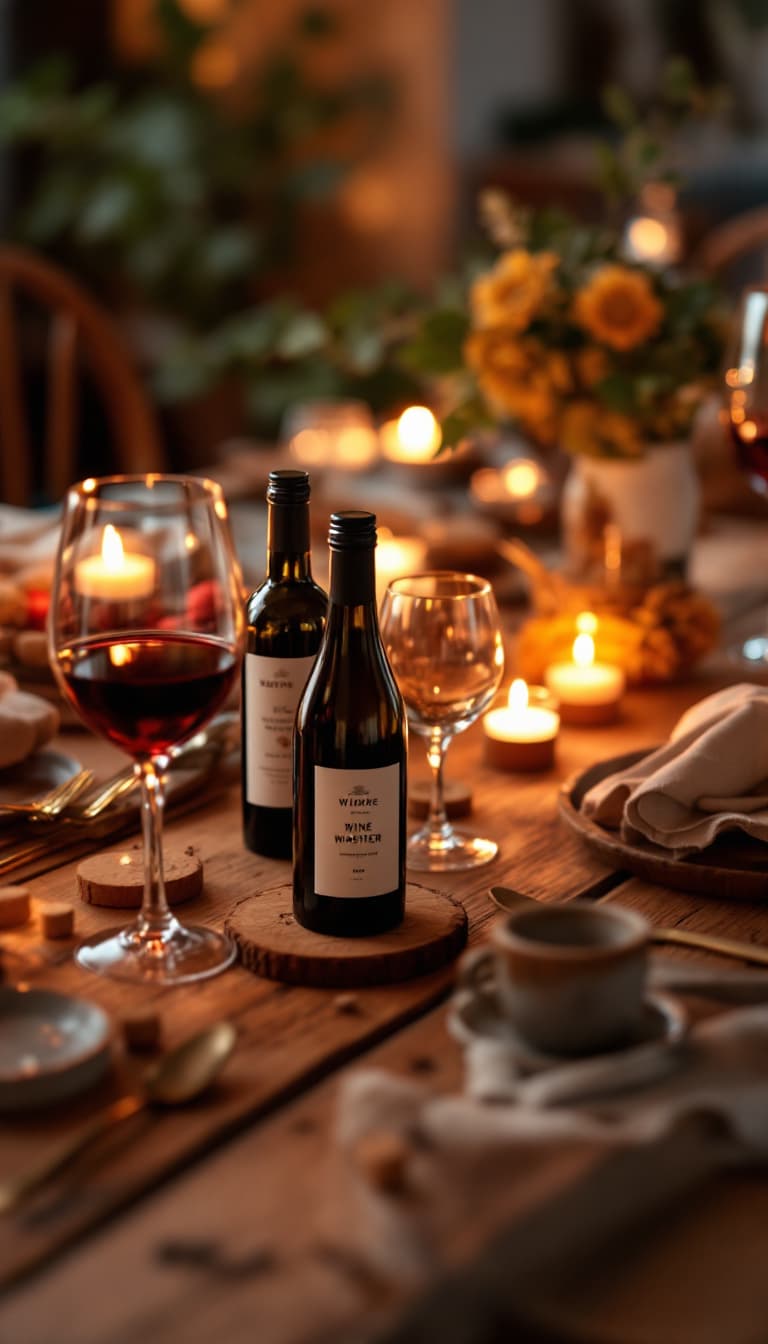
Mini Wine Bottles with Personalized Labels
Mini bottles make guests feel like they are leaving with the night’s highlight in hand. You can pour from the winning bottles into 187 ml glass minis, or buy minis of the same varietal to match the tasting. Add a label with your event name, date, and a quick tasting note or a fun quote like “Pairs with good company.”
How to do it fast:
- Buy clean 187 ml bottles with caps, or save and sanitize minis.
- Fill with guest-favorite wines from the tasting using a small funnel.
- Design labels in Canva or Avery’s online tool, then print at home or through their service.
- Stick labels on dry bottles, then add a ribbon or wax seal for a polished look.
Why it works:
- Wow factor: Tiny bottles feel special and photo-worthy.
- Easy personalization: Free online templates make design simple.
- Budget range: 2 to 6 dollars per favor, depending on the wine.
Where to source:
- Minis and labels from Total Wine, Trader Joe’s, Costco, or local shops.
- Blank bottles and label sheets from Amazon, Uline, or craft stores.

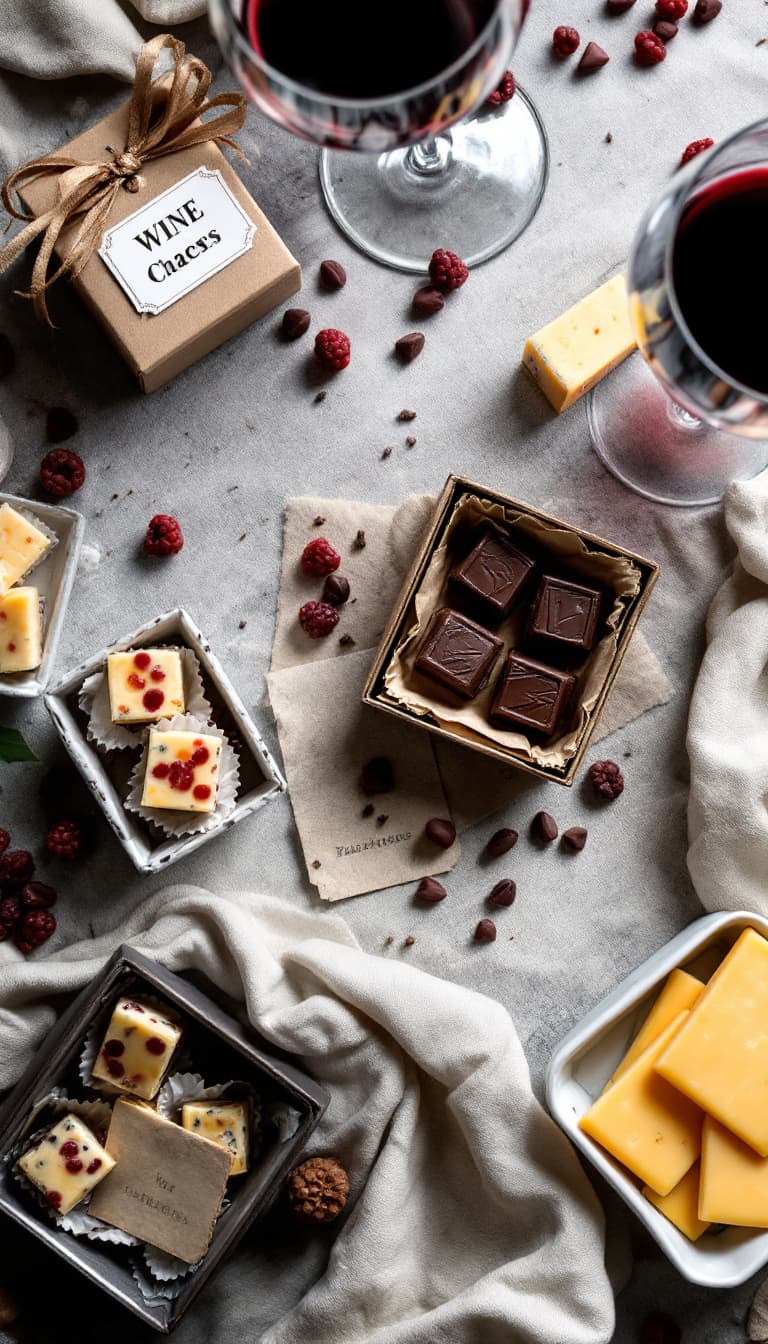
Wine-Themed Chocolate or Cheese Packs
A small tasting pack lets guests continue the pairing at home. Think two dark chocolate squares or two cheese bites, sealed and labeled with a pairing hint like “Cabernet + 70% dark” or “Sauvignon Blanc + goat cheese.”
Smart pairing ideas:
- Dark chocolate with Cabernet or Zinfandel.
- Sea salt caramel with Port or late harvest wines.
- Goat cheese with Sauvignon Blanc.
- Aged cheddar with Merlot or Rioja.
Packaging tips:
- Use food-safe bags or mini boxes, plus an ice pack if you include cheese.
- Add a simple card with the pairing and a storage note.
- Keep portions small to control cost and waste.
Why it works:
- Extends the tasting: Guests try the match the next day.
- Practical: No clutter, just a tasty moment.
- Budget range: 1 to 4 dollars per favor.
Where to source:
- Chocolates from Trader Joe’s, Aldi, or World Market.
- Cheese bites from Costco or local creameries.
- Boxes, bags, and cards from Michaels or Paper Source.
Custom Cork Ornaments or Keychains
Turn the night’s corks into keepsakes. Use the actual corks from the bottles you opened, then add a screw eye, jump ring, and ribbon for an ornament, or a key ring for a keychain. Add a small tag or wood-burn the date for a personal touch.
Simple steps:
- Pick intact, dry corks from the event.
- Twist in a small screw eye by hand.
- Attach a ribbon or key ring with a jump ring.
- Stamp or engrave the date, or tie on a mini tag.
Why it works:
- Eco-friendly: Reuses corks you already have.
- Sentimental: Every glance recalls the night.
- Budget range: Under 1 dollar per piece if you have the corks.
Where to source:
- Hardware bits from craft stores or Amazon.
- Mini tags from Etsy or office supply stores.
- For engraving, use a basic wood-burning pen or a local maker.
Bottle Stoppers and Wine Accessories
Useful tools never collect dust. A classy stopper, an easy-pull corkscrew, or a simple aerator helps guests enjoy wine at home. Choose one item for consistency, or offer a small mix so guests can pick their favorite.
Good picks by budget:
- Under 3 dollars: Silicone or stainless steel stoppers in bulk.
- 3 to 7 dollars: Wing corkscrews or waiters’ keys.
- 7 to 12 dollars: Small aerators or vacuum pump sets with two stoppers.
Personal touch ideas:
- Add a tag with a storage tip, like “Reseal and refrigerate for 2 to 3 days.”
- Tie stoppers with ribbon that matches your table decor.
- Include a mini card with your top wine from the night.
Where to source:
- Bulk sets from Amazon, WebstaurantStore, or IKEA.
- Nicer single pieces from Target, Crate & Barrel, or local wine shops.
These favors reinforce the theme, suit different budgets, and make the tasting feel complete. Mix one keepsake with one edible treat for a balanced favor bag that guests will use and remember.
How to Choose Party Favors That Match Your Wine Tasting Theme
Party favors should echo the wines you pour and the mood you set. Start with your theme, then layer in wine styles, guest preferences, and budget. A rustic vineyard table pairs well with natural textures and warm tones. A modern chic night calls for clean lines, black and white, and metallic accents. Keep favors small, useful, and easy to pack.
Steer clear of generic trinkets, strong scents, and fragile pieces. Aim for favors that connect to a wine note, a color on your table, or a moment from the tasting. That link is what makes the favor feel personal and on-brand.
Aligning Favors with Your Event’s Wine Selection
Match favors to the wine styles you serve, so the gift feels like a natural extension of the tasting.
- Bold reds (Cabernet, Syrah, Malbec): Lean into rich colors, leather, and dark flavors. Think dark chocolate squares with a “blackberry and cocoa” tag, deep burgundy ribbons, matte black bottle stoppers, or leather cord wine charms. Example: Cabernet night with 70% dark chocolate and black wax-sealed mini notes.
- Light reds (Pinot Noir, Gamay): Highlight red fruit and elegance. Use cherry jam minis, rose gold foil tags, or cranberry-hued tea lights. Example: Pinot Noir with a cherry preserve sampler and a tasting card that notes “silky, red fruit.”
- Crisp whites (Sauvignon Blanc, Albariño): Play up citrus, herbs, and freshness. Try lemon shortbread bites, citrus bath salts, or seed packets for basil or parsley. Example: Sauvignon Blanc paired with a basil seed packet labeled “Herb note, fresh finish.”
- Round whites (Chardonnay, Viognier): Showcase vanilla and stone fruit warmth. Add vanilla-scented tealights, honey sticks, or small peach gummies. Example: Chardonnay with a vanilla tealight and a gold ribbon.
- Rosé: Keep it airy and fun. Use blush lip balms, pink sea salt sachets, or strawberry pastilles. Example: Dry rosé with Himalayan pink salt and a pale blush tag.
- Sparkling: Celebrate bubbles with shine and texture. Think gold-foil wine tags, confetti packets, glitter-edged coasters, or mini sugar cubes for Champagne cocktails. Example: Prosecco with gold foil stickers and a “bubbly and bright” note.
Tie these picks to your theme:
- Rustic vineyard: Cork, twine, kraft tags, pressed leaves, linen ribbon.
- Modern chic: Clear acrylic tags, monochrome labels, sharp typography, chrome stoppers.
- Coastal patio: Soft blue accents, sea salt caramels, white linen, shell-toned tags.
Small design choices bring cohesion. Use the same font, color family, and label shape across all favors and cards. Add one tasting note per favor to lock the memory in place.
Budget-Friendly Options Without Sacrificing Style
You can keep costs low and still look polished. Focus on bulk buys, DIY upgrades, and thoughtful packaging.
Smart savings that look premium:
- Bulk basics, elevated: Buy plain silicone stoppers, tea lights, or mini bags in bulk. Upgrade with ribbon that matches your table, a clean label, and a short tasting note.
- DIY labels: Use Avery or Canva templates for modern, consistent labels. Print at home, then apply to minis, bags, or tins for a boutique look.
- Cork upcycle: Turn event corks into ornaments or keychains with a screw eye and ring. Add a micro tag with the date. Cost stays under a dollar.
- Two-piece bundles: Pair one edible item with one reusable tool. Example: a dark chocolate square plus a stainless stopper. The mix feels richer without a big spend.
- Restaurant supply and discount stores: Source coasters, tasting cups, or boxes in cases, then customize with a stamp or sticker.
Small touches that add impact:
- Use consistent color cues from your wines, like deep reds or pale gold.
- Add a mini tasting card with your top bottle and why you loved it.
- Seal tags with a wax dot or gold sticker for a clean finish.
- Include a QR code to a shared playlist or your tasting notes.
Avoid common budget traps:
- Too generic: Skip random trinkets with no tie to the wines or theme.
- Fragile items: Avoid glass favors that chip in transit.
- Strong fragrances: Keep scents light, so they do not fight with wine memories.
- Bulky packaging: Large boxes raise costs and are hard to carry.
Aim for one to three dollars per favor for groups, five to seven dollars for smaller parties. With clean design and a clear link to the wines, even low-cost favors feel premium.
Easy DIY Party Favors for Wine Tasting Enthusiasts
DIY favors feel warm, personal, and thoughtful. Guests notice the care you put in, and the gift tells a story from your tasting. These three ideas use simple supplies, keep costs low, and look polished. Each one packs easy customization, quick assembly, and a pretty finish that travels well.
Homemade Wine Jelly Jars
Turn leftover pours into a glossy, fruit-forward jelly. It is edible, unique, and a perfect nod to the wines you loved.
What you need:
- 2 cups wine (red, white, or rosé)
- 2 cups sugar
- 1 pouch liquid pectin, or 1.75 oz powdered pectin
- 1 tablespoon lemon juice
- 4 to 6 small canning jars with lids
- Funnel, ladle, large pot, and a clean towel
- Labels, ribbon, and a fine-tip marker
How to make it:
- Sanitize jars. Wash in hot soapy water, then keep warm. Simmer lids in hot water.
- Heat wine and lemon juice in a pot. Bring to a gentle boil.
- Stir in sugar. Whisk until fully dissolved.
- Add pectin. Return to a hard boil for 1 to 2 minutes. Skim foam if needed.
- Fill jars. Use a funnel, leave 1/4 inch headspace, wipe rims, and add lids.
- Optional water bath. Process 5 minutes for a shelf-stable seal. Or refrigerate for up to 3 weeks.
- Label when cool. Include wine type, date, and a serving idea.
Flavor notes that work:
- Cabernet: Black cherry, cocoa vibe, pairs with cheddar.
- Sauvignon Blanc: Citrus, herb notes, great with goat cheese.
- Rosé: Strawberry and melon, lovely on scones.
Time and budget:
- Time: 45 to 60 minutes for 4 to 6 minis
- Cost: About 0.75 to 1.50 dollars per jar if you reuse wine and buy jars in bulk
Safety tips:
- Boiling liquid can splatter. Use a deep pot and long spoon.
- Check seals. Lids should not flex up and down when pressed.
- If not water-bathed, store in the fridge and use within 3 weeks. When in doubt, toss.
Why guests love it:
- Edible memory that ties back to a favorite bottle.
- Easy to spread on toast or pair with cheese the next day.
Personalized Wine Cork Crafts
Give corks a second life with magnets or a trivet. It is eco-friendly, easy to make, and very customizable.
What you need:
- Clean wine corks, natural or synthetic
- Strong glue, like hot glue or gel super glue
- Small magnets, or a cork trivet base or wood board
- Craft knife, ruler, cutting board, and sandpaper
- Paint pen, stamp set, or tiny stickers for initials and dates
Magnets:
- Slice a thin sliver off the back of each cork so it lays flat.
- Glue a magnet to the flat side. Hold for 20 seconds.
- Add initials or the event date with a paint pen.
- Let cure per glue instructions.
Trivet:
- Arrange corks in rows, a honeycomb, or a circle. Test the layout first.
- Glue corks to a heat-safe base or glue corks to each other in tight rows.
- Press and hold, then weight with books for 1 hour.
- Add felt pads to the back to protect tables.
Customization ideas:
- Color dip: Paint the ends to match your table palette.
- Stamped tags: Tie on a mini tag that lists your top wine.
- Mix cork types: Combine prints for fun texture.
Time and budget:
- Time: 20 minutes for 8 to 10 magnets, 40 minutes for one trivet
- Cost: Under 1 dollar per magnet, 3 to 6 dollars per trivet
Safety tips:
- Use a cutting board and cut away from your hand.
- Hot glue burns hurt. Keep a bowl of cold water nearby.
- If you use super glue, open a window and protect your work surface.
Why guests love it:
- Upcycled and personal, with the actual corks from your night.
- Useful at home, so it does not end up in a junk drawer.
Scented Sachets Inspired by Wine Aromas
Bottle the bouquet without the bottle. These sachets echo wine notes using essential oils and natural fillers.
What you need:
- Small muslin or linen bags
- Dried lavender, rice, or Epsom salt as a filler
- Essential oils that match classic wine notes
- Cellophane bags, ribbon, and labels
Aroma blends that make sense:
- Pinot Noir: 2 drops black pepper, 3 drops vanilla, 4 drops sweet orange
- Chardonnay: 3 drops vanilla, 3 drops bergamot, 1 drop sandalwood
- Sauvignon Blanc: 4 drops lemon, 2 drops basil, 2 drops grapefruit
- Syrah: 3 drops clove, 2 drops cedarwood, 2 drops blackberry if available
Assembly:
- Fill each bag with 2 tablespoons filler.
- Add 6 to 8 total drops of oils per bag. Start light, adjust to taste.
- Tie shut, massage to distribute scent, and let sit 30 minutes.
- Slip each sachet into a cellophane bag, tie with ribbon, and label with the blend name and notes.
Time and budget:
- Time: 10 to 15 minutes for 6 to 8 sachets
- Cost: About 0.50 to 1 dollar each when bought in bulk
Safety tips:
- Essential oils are potent. Avoid skin and eye contact.
- Keep away from kids and pets. Do not use near food.
- Store oils in a cool, dark spot and label clearly.
Why guests love it:
- Wine-adjacent scent that brings back the tasting notes.
- Looks boutique when packed in clear cellophane with a neat label.
DIY favors show care, stretch your budget, and help you reuse materials you already have. Want an easy win? Pair wine jelly with a cork magnet and a sachet. Guests leave with flavor, function, and a hint of aroma, all tied to your tasting.
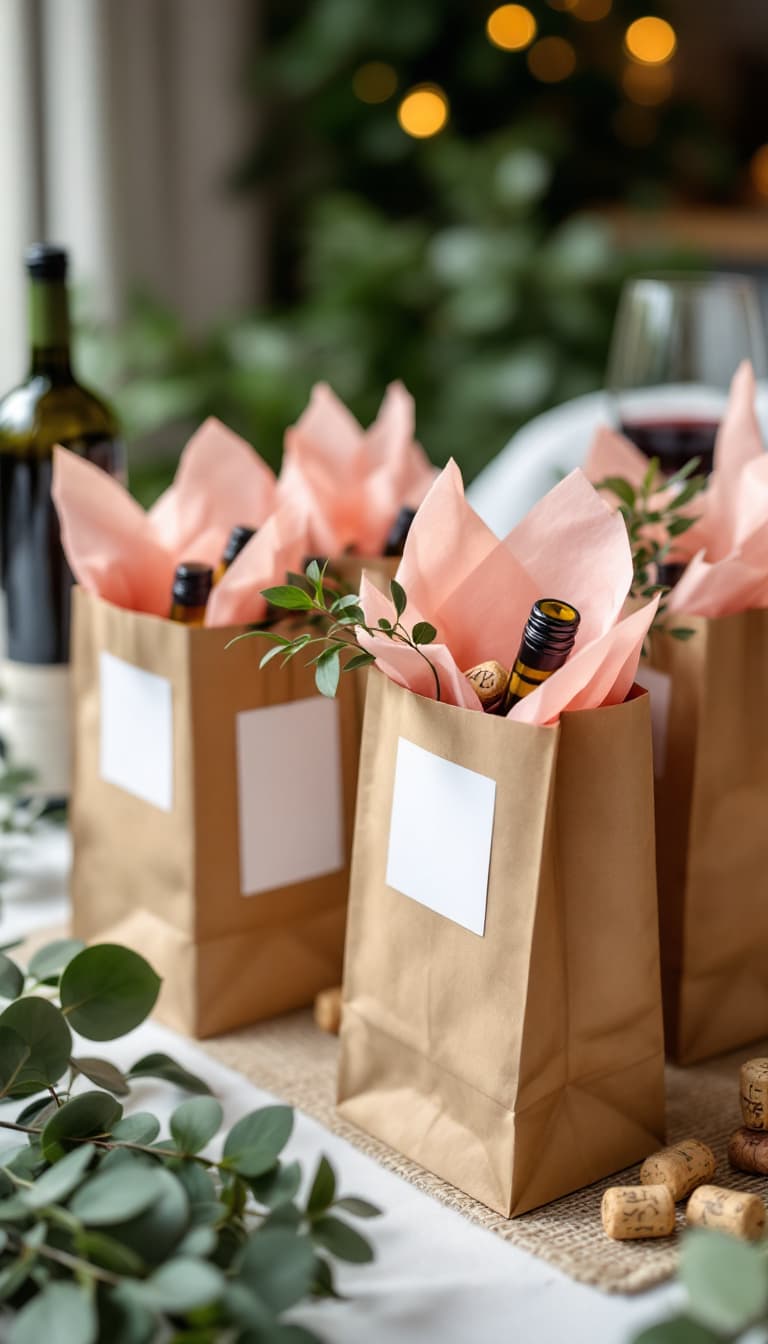
Tips for Presenting and Distributing Wine Tasting Party Favors
Small details make favors feel special. Package them cleanly, present them where guests can see them, and hand them out at the right moment. A little planning keeps the exit smooth and the memory strong.
Packaging That Looks Polished on a Budget
Dress simple items with a few tidy touches. Keep the look consistent with your tasting theme and wine styles.
- Choose a base: Kraft or white gift bags, or clear cellophane for edible items.
- Add tissue and a tie: One sheet of tissue in a theme color, plus ribbon or twine.
- Label smart: Use the same font and label shape across all favors. Keep text short.
- Protect fragile pieces: Wrap stoppers and minis in tissue or bubble sleeves.
- Separate food: Bag chocolates or cheese in food-safe wrappers, then tuck into the main bag.
- Bundle with purpose: One reusable tool plus one edible treat feels complete without bulk.
Example: A white bag with blush tissue, a matte black ribbon, and a small label that reads “Cabernet favorite + dark chocolate.”
When and How to Hand Out Favors
Timing affects how favors travel and get used. Aim for a smooth exit and clear cues.
- Hand out at the end: Place favors near the door or dessert table. Guests can grab and go.
- Use a favor station: Add a small sign, “Take one,” and list what is inside.
- Seat drop for dinners: Place a favor at each setting if you want a photo-ready table.
- Ticket method: Give each guest a claim card on arrival for limited items, then trade it at the end.
- Perishable plan: Keep cheese or jelly in a cool bin, then pass out as guests leave.
- Have extras: Prep 10 percent more in case of plus-ones or breakage.
Thank-You Notes and Social Sharing
A short thank-you card turns a favor into a keepsake. Tie in photos and future tastings without clutter.
- Mini thank-you: One sentence, your names, the date, and your top bottle from the night.
- Prompt a photo: Add a small line like “Share a pic with #YourWineNight.”
- QR code: Link to a shared album, playlist, or tasting notes. Keep the code small and clear.
- Photo corner: Set a simple backdrop with a letter board. Encourage one group photo per guest.
- Raffle hook: Offer a bonus mini bottle drawing for anyone who posts by the next day.
Keep it friendly, not pushy. Guests should feel invited, not obligated.
Logistics for Larger Parties
Scale your process so nothing feels chaotic. A few systems save time and stress.
- Batch assembly: Set up an assembly line by item type. Pack in bins labeled by content.
- Color code: Use ribbon colors for red, white, rosé, or non-alcohol favors.
- Pre-label names: If seating is assigned, tag each favor with the guest’s name.
- Allergen notes: Mark items that include nuts, dairy, or gluten. Offer a safe alternative.
- Traffic flow: Place the favor station away from the bar. Add a clear entry and exit path.
- Volunteer roles: Assign one person to restock, one to guide guests, one to manage perishables.
- Transport ready: Use sturdy totes with lids for moving favors to and from the venue.
- Leftover plan: Keep a small list of guests to mail or hand-deliver any extras.
Presentation Ideas That Tie Back to the Tasting
Let the display echo your wines so the story carries through.
- Varietal zones: Group favors under small signs like “Bold Reds” or “Crisp Whites.”
- Color blocking: Match tissue and ribbons to the wine palette, from deep garnet to pale gold.
- Top pick highlight: Add a card, “Guest Favorite: 2020 Cabernet,” near the favor station.
- Favor bar: Offer one tool and one treat per guest. Post simple rules, “Pick one of each.”
- Place card tags: Tie a tiny tasting note to each favor with the guest’s favorite pour.
Keep it simple and tidy. Clean lines and clear labels always read as premium.
Conclusion
Thoughtful favors take your tasting from fun to unforgettable. Keep them small, useful, and tied to your wines, then finish with clean packaging and smart timing. Mix one edible treat with one reusable tool, add a short note, and you are set.
Try one idea at your next wine night, then share how it went in the comments. Drop your favorite favor pick, or a photo if you have one. Want more easy hosting tips? Subscribe so you never miss a new guide.