
Tasting Tray for Wine: How to Choose One, Set It Up, and Taste With Confidence

Wine tasting at home sounds simple until you’re juggling bottles, guessing which glass holds what, and wiping up drips on the counter. A tasting tray for wine fixes that problem in a surprisingly satisfying way.
Think of it like a little “control center” for small pours. It keeps each wine in its place, helps you label them fast, and makes side-by-side tasting feel organized instead of chaotic. It’s also a nicer look when friends come over, even if it’s just a casual Tuesday night.
This guide breaks down what to look for, how to set up a tray in minutes, and how to taste in a way that actually helps you notice differences. Example: pour four wines (two Pinots and two Cabs), line them up, and compare them without losing track.
What a wine tasting tray is (and why it beats random glasses)

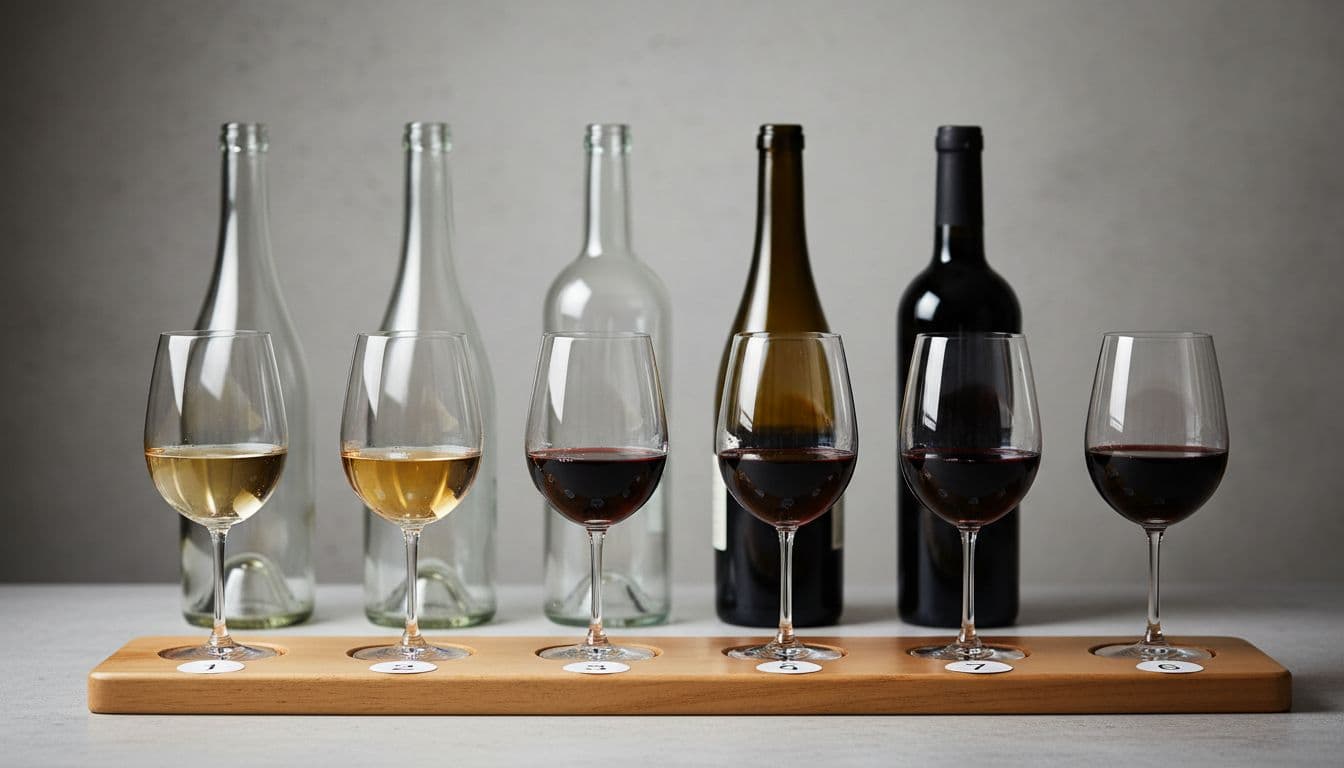
A wine tasting tray is a tray or board designed to hold multiple small pours at once, so you can compare wines side by side. Some hold full-size stemmed glasses, others hold stemless glasses or small tasting cups. Many include space for labels, chalk writing, or small tags, which matters more than people expect.
When you taste wine one glass at a time, your memory does a lot of guessing. You might love the first sip of Wine A, then move to Wine B, and by the time you circle back, you’re not sure what changed. A tasting tray keeps all the wines in view so you can re-taste quickly and trust what you’re noticing.
It also solves a bunch of real-life home tasting issues:
- Better comparisons: You can smell and sip wines back-to-back while they’re at similar temperature.
- Less spilling: One tray to carry beats four glasses balanced in your hands.
- Easy labeling: A simple number or name stops the “Wait, which one was the Malbec?” moment.
- A nicer presentation: Guests feel like you planned it, even if you didn’t.
- A built-in pace: Small pours slow things down, which helps you taste more clearly.
A tasting tray also makes wine feel less intimidating. It turns tasting into something closer to sampling sauces with dinner, where you’re allowed to have favorites and change your mind on the second sip. And if you’re trying to learn what you like, side-by-side tasting is the fastest teacher.
How many wines should go on a tasting tray?
A good range is 3 to 6 wines. More than that can blur your palate, and it’s harder to remember what you’re tasting.
For most beginners, 4 wines is the sweet spot. It’s enough variety to spot patterns (same grape, different region), but not so much that the last glass tastes like “generic red.”
Keep pours small: 1.5 to 2 ounces per wine. That’s enough for two or three thoughtful sips, plus a re-taste. Small pours also help you stay sharp and keep the night fun, not foggy.
Tasting tray vs flight board vs charcuterie board
These terms get mixed up, but they do different jobs.
- A wine flight board usually holds glasses in cutouts, often in a straight line. It’s about carrying and serving.
- A wine tasting tray can be a board, paddle, or tray that holds glasses or sample cups, and often includes labeling space. It’s about comparing and keeping things organized.
- A charcuterie board is for food, not glassware. It’s flat, and it gets crowded fast once you add knives and bowls.
If you want to use all three, keep it simple: put the tasting tray in the center, set the charcuterie board off to one side, and leave a clear “parking zone” for bottles. Crowding the table is the fastest way to spill something expensive.

How to choose the right tasting tray for wine
The best tasting tray is the one that fits your glasses, matches how you host, and doesn’t become annoying to clean. If you’re shopping online, you’ll see names like wine flight board, wine tasting paddle, and wine tasting tray set. They can all work, as long as the tray is stable and sized for real glasses.
Start by thinking about how you’ll use it:
If you already own nice stemware, look for a tray with glass cutouts or recessed rings that keep stems from sliding. If you prefer casual tastings, a flat tray with space for small cups and labels can be easier.
A few practical buying checks help a lot:
- Capacity: 3 to 6 spots is ideal for home tastings.
- Spacing: Glasses should sit far enough apart that you can swirl without clinking.
- Label area: Chalk strip, engraved numbers, tag holes, or space for a small card.
- Cleaning: If you won’t wipe it down after a night of wine, it’ll look rough fast.
Also, be honest about storage. A long paddle-style flight board looks great, but it can be awkward in a small kitchen. A compact tray with a handle is easier to tuck away.
Material and build: wood, bamboo, acrylic, slate, or stainless steel
Material affects look, feel, and how the tray holds up over time.
Wood
- Pros: Warm, classic, looks great in photos, often sturdy.
- Cons: Can stain if unsealed, may hold odors if wine soaks in.
Bamboo
- Pros: Light, clean look, often less expensive than hardwood.
- Cons: Can warp if it stays wet, some versions scratch easily.
Acrylic
- Pros: Easy to wipe clean, modern, doesn’t absorb stains.
- Cons: Can scratch, may feel slippery without grip pads.
Slate
- Pros: Beautiful presentation, easy to write on with chalk.
- Cons: Heavy, can chip, needs careful handling on tables.
Stainless steel
- Pros: Very easy to sanitize, won’t stain, great for repeated use.
- Cons: Can feel “industrial,” fingerprints show, may slide without rubber feet.
Whatever you pick, look for food-safe finishes and sealed surfaces. Sealed trays don’t soak up wine, and they’re easier to keep smelling fresh.
Fit and stability: will it hold your glasses safely?
Before you buy, measure one of your most-used glasses:
- Base width: Some boards have cutouts that are too small for wide bases.
- Stem thickness: Cutouts can pinch thick stems and wobble thin ones.
- Glass height: Tall glasses tip more easily if the tray is narrow.
Stability features are worth paying for: non-slip feet, raised edges, and handle cutouts that feel secure in your hand.
One quick warning: avoid trays that feel balanced only when every spot is full. If a tray tips when one glass is empty, it’s going to frustrate you. You want a board that stays steady even as people finish at different times.
Set up a wine tasting tray at home, step by step
A tasting tray works best when you keep the plan simple. You don’t need a script, but you do need a little structure so the tasting feels clear.
Step 1: Choose your wines and chill timing
Pick 3 to 6 bottles, then check temperature early so you’re not rushing later. If you’re doing four wines, plan on opening the first bottle 10 to 15 minutes before you pour, especially for reds that need a little air.
Step 2: Set the tray and glasses
Put the tray where people can reach it without bumping elbows. If your tray holds glasses, place the glasses first, then label the spots. If it holds sample cups, set cups and labels together so they don’t separate mid-tasting.
Step 3: Arrange wines in a smart order
Line up from lighter to bolder when possible. If you’re mixing styles, keep sparkling or light whites on the left, then fuller whites, then reds, then sweet wine last.
Step 4: Label before you pour
Labeling after pouring is how mistakes happen. Do it first, even if it’s just “1, 2, 3, 4.”
Step 5: Pour small and consistent
Aim for 1.5 to 2 ounces each. Try to pour the same amount in every glass so comparisons feel fair. If you’re hosting, pour everyone’s first round, then stop. Let people sip before you top up anything.
Step 6: Keep glass care basic
Clean, scent-free glasses matter more than fancy glass shapes. Skip strongly scented dish soap right before tasting if you can, since it can cling. If a glass smells like soap or cabinet dust, rinse with hot water and air-dry.
Step 7: Pace the tasting
A tray makes it tempting to sip fast. Slow it down. Encourage a re-smell after the first sip. Wine changes in the glass, and that’s part of the fun.
Pick a theme that makes comparing wines easy
A theme gives your tasting a point. It also makes the “why does this taste different?” question easier to answer.
Here are a few themes that work well at home:
- Same grape, different regions (Pinot Noir from Oregon vs California)
- Same region, different producers (two or three wineries from the same area)
- Oaked vs unoaked (Chardonnay is a great teacher here)
- Sparkling styles (Prosecco vs Cava vs Champagne-style sparkling)
- Budget vs splurge (same grape, two price points)
- Red blend showdown (two blends with different dominant grapes)
If you’re new, start with one grape. It keeps your brain from juggling too many variables at once.
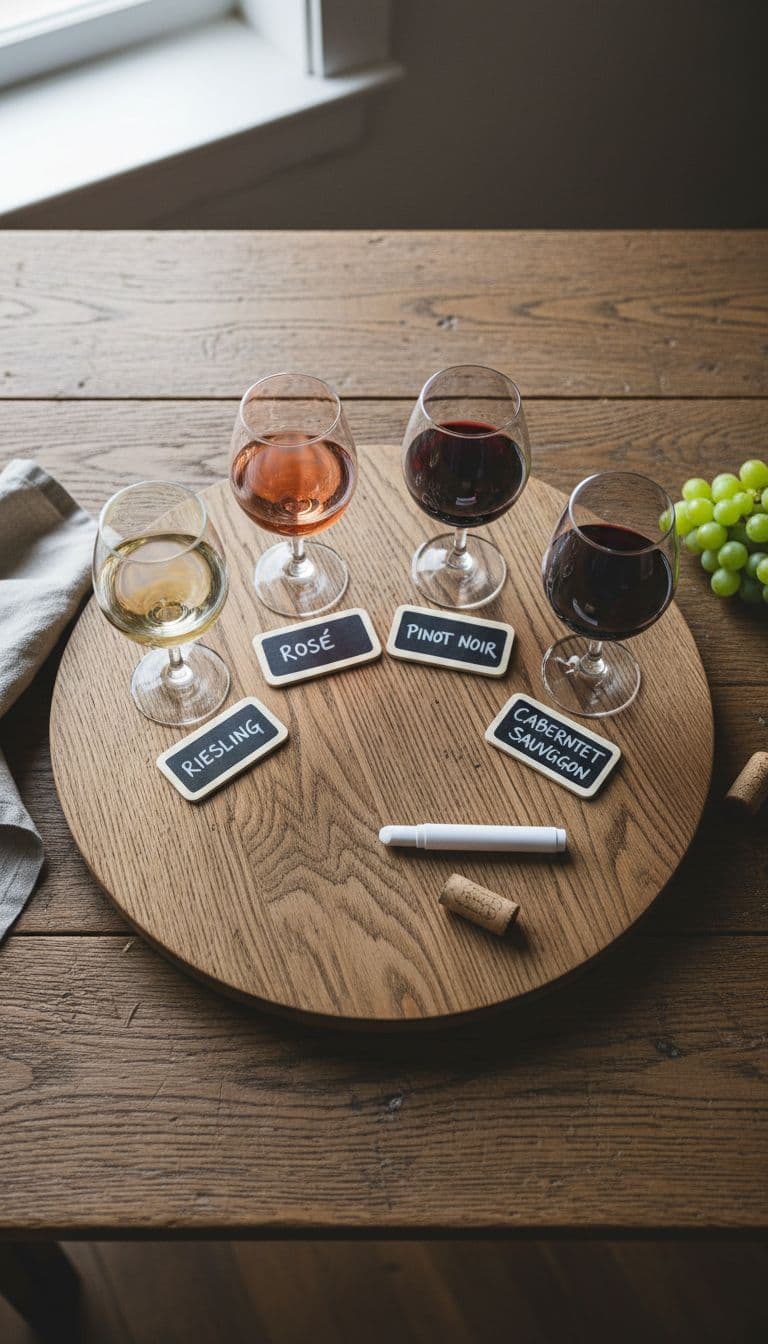
Label each pour so nobody forgets what they liked
Labeling is the difference between “I loved number three” and “I loved… something red?”
Simple label options:
- Chalk marker on a tray label strip
- Numbered tags tied to the tray handle
- Small tent cards placed under each glass
- Painter’s tape on the glass base (peels off clean)
A quick tasting sheet helps, even on scrap paper. Use three simple ratings:
- Smell (1 to 5)
- Taste (1 to 5)
- Would you buy it again? (yes or no)
Also, take a photo of the lineup with bottles in the background. That one picture saves a lot of guesswork later.
Serve wine at the right temperature without overthinking it
Temperature changes how wine tastes. Too warm can make alcohol feel sharp. Too cold can hide aroma and flavor.
Use easy ranges:
- Sparkling: well-chilled
- Whites and rosé: chilled
- Reds: slightly cool, not warm
Quick fixes work fine:
- Red too warm? Put it in the fridge for 10 minutes.
- White too cold? Let it sit on the counter for 5 minutes.
If you’re tasting several bottles, keep them steady with a bucket (ice and water works best) or a chill sleeve for whites and sparkling. For reds, a cool room and short fridge time usually does the trick.
How to taste from a tray like a pro (without feeling fancy)
You don’t need big vocabulary to taste well. You just need a repeatable method, so you notice what changes from glass to glass.
Try this simple loop:
Look: Check color and clarity. Is it pale, deep, ruby, gold?
Smell: Take one short sniff, then one deeper sniff.
Sip: A small sip, let it coat your mouth.
Think: Is it dry or sweet? Light or heavy? Smooth or grippy?
Compare: Go back to the first glass and re-taste.
Beginner-friendly flavor words that don’t feel forced:
- Fruit: apple, pear, lemon, cherry, blackberry
- Other: vanilla, toast, pepper, cocoa, herbs
- Feel: crisp, creamy, juicy, drying
A tray makes comparison easy because you can re-smell wines after a few minutes. Often the “quiet” wine at first ends up being the favorite once it opens.
A simple tasting order that helps every wine shine
Order matters because stronger wines can drown out lighter ones.
A reliable order:
- Sparkling first
- Light to bold
- Dry before sweet
- Lower alcohol before higher alcohol
Also watch your snacks. Strong blue cheese, spicy chips, and sweet desserts can wreck your sense of balance. Save the loud flavors for after you’ve made your picks.
Palate cleansers that actually work
You don’t need a fancy palate reset. You need neutral, boring foods.
Good options:
- Water (still or sparkling)
- Plain crackers
- Bread
- Mild cheese
Skip garlic dips, hot salsa, super-salty snacks, and sugary treats during the tasting. And keep a simple rule: drink water between pours, even if it’s just a few sips.
Conclusion
A tasting tray for wine turns home tasting into something cleaner, calmer, and more fun. It keeps pours organized, makes comparisons easier, and helps guests relax because nothing feels confusing. The best part is how quickly you learn what you like when four wines sit in front of you at once.
Start small: pick a simple theme, set up four wines, label them clearly, and pour 1.5 to 2 ounces each. Save your notes (and that lineup photo), then repeat the idea next weekend with a new grape or region. What’s the next flight night you want to host, crisp whites, cozy reds, or bubbles?